I'm going to a festival next weekend and one project I always think about doing when I come back from one is a light up bucket hat. The idea is pretty simple, grab a bucket hat, attach an LED strip somehow and write some simple code to display different patterns.
I have thought about this project a little last minute, so I only have a day or so over the weekend to get it complete.
Gathering the parts
Luckily, I have a lot of the parts on hand, which is great for the short deadline I set myself.
For the lights, I'm going to use a strip of WS2812b LEDs which are individually addressable. You can also get a flexible matrix, or fairy light versions and they're pretty common these days on online maker shops or eBay. For the microcontroller, I have a really small Raspberry Pi Pico on hand which is nice and compact. The LED strip doesn't require any extra electronics so it can be directly wired to the microcontroller.
Ideally the LED strip would have some extra protection against things like drinks being thrown in the air, or just the potential bumps and stuff that might happen. The best option for this is probably a flexible rubber channel. I found a couple online, but they didn't have amazing reviews and I didn't have enough time to order it. It also looks as though it would double as a bit of a diffusion layer too. I won't link one here, as I don't want to potentially recommend something without trying it.
As for powering the project, to make it look really slick looking I'd put a rechargeable battery in the hat, however I'm not sure I trust a battery that I've modified right next to my head. So instead I'm going to have a cable going from the hat into a battery bank in my pocket.
With the right microcontroller, you could also make a cool web interface, or have it Bluetooth controlled, or even something more crazy like Meshtastic or crowd controlled. I stuck with just a button to control it so that I could use my tiny microcontroller on it's own.
Code
I decided to start with the code and basic electronics, just to make sure everything works before I assemble it.
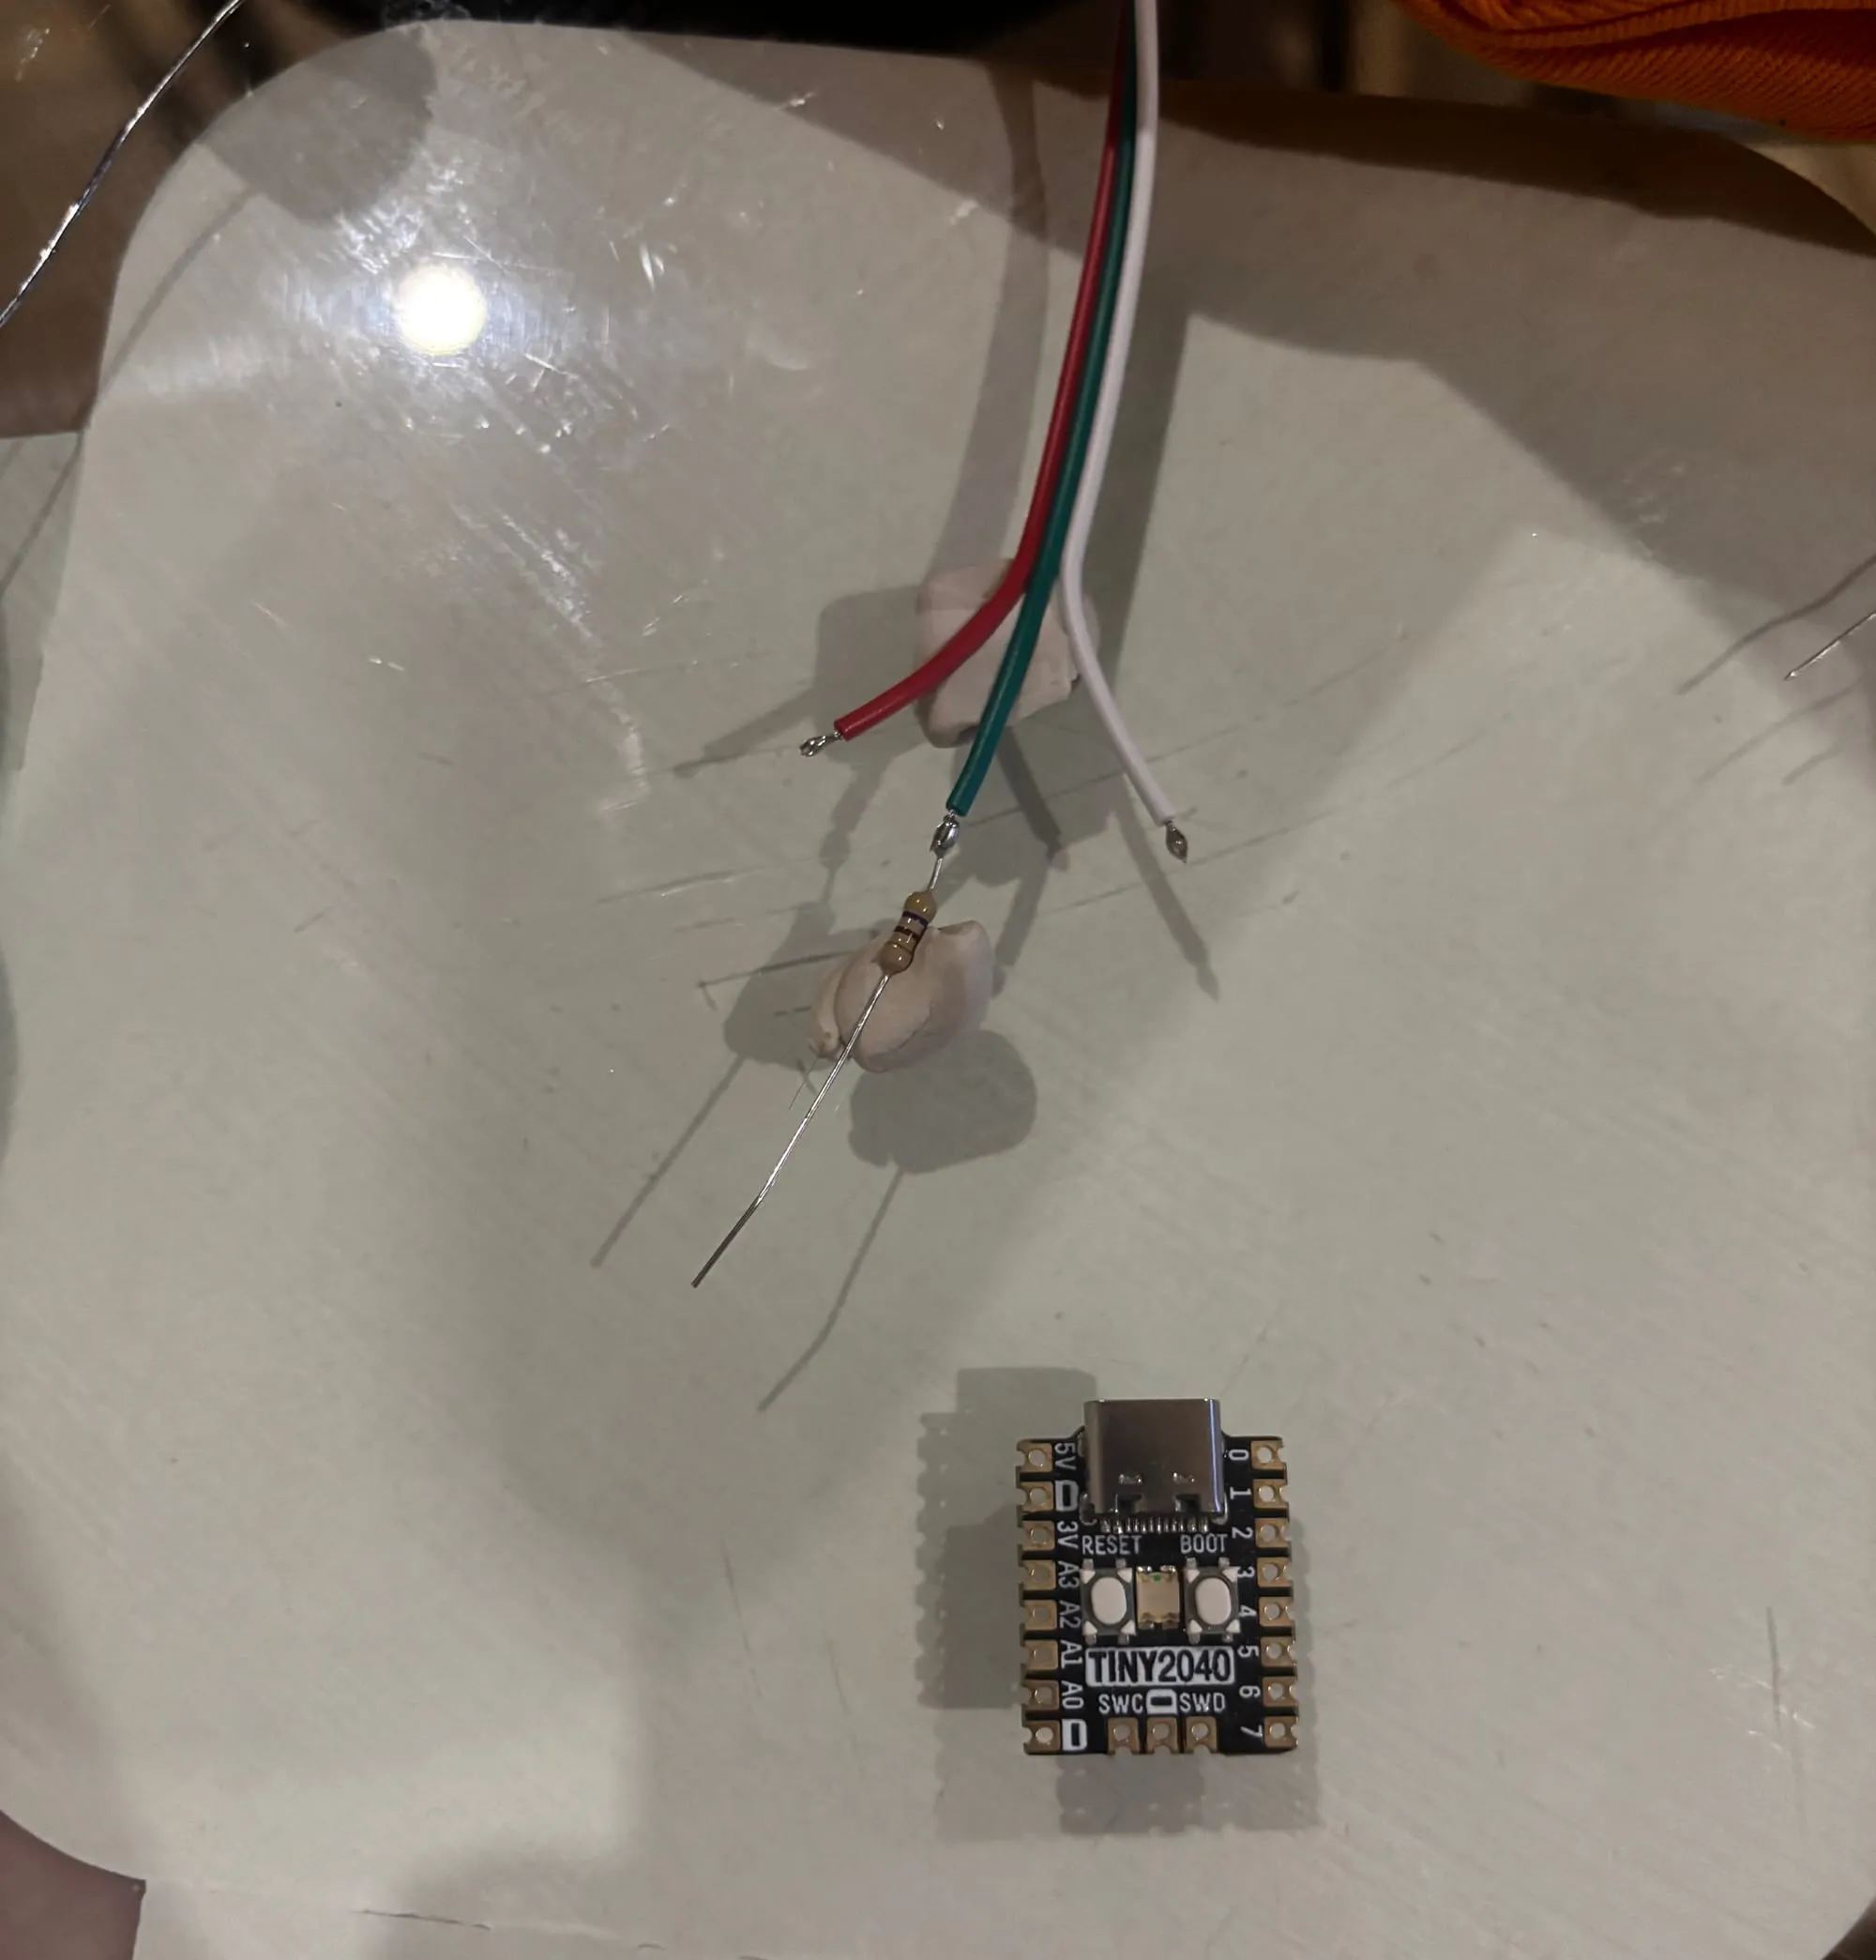
I used a larger Raspberry Pi Pico board that I use a lot for testing things out. I also decided to add in a resistor to the data line of the LEDs just for extra safety - it helps protect the microcontroller from excessive current draw and can prevent reflections of the data signal.
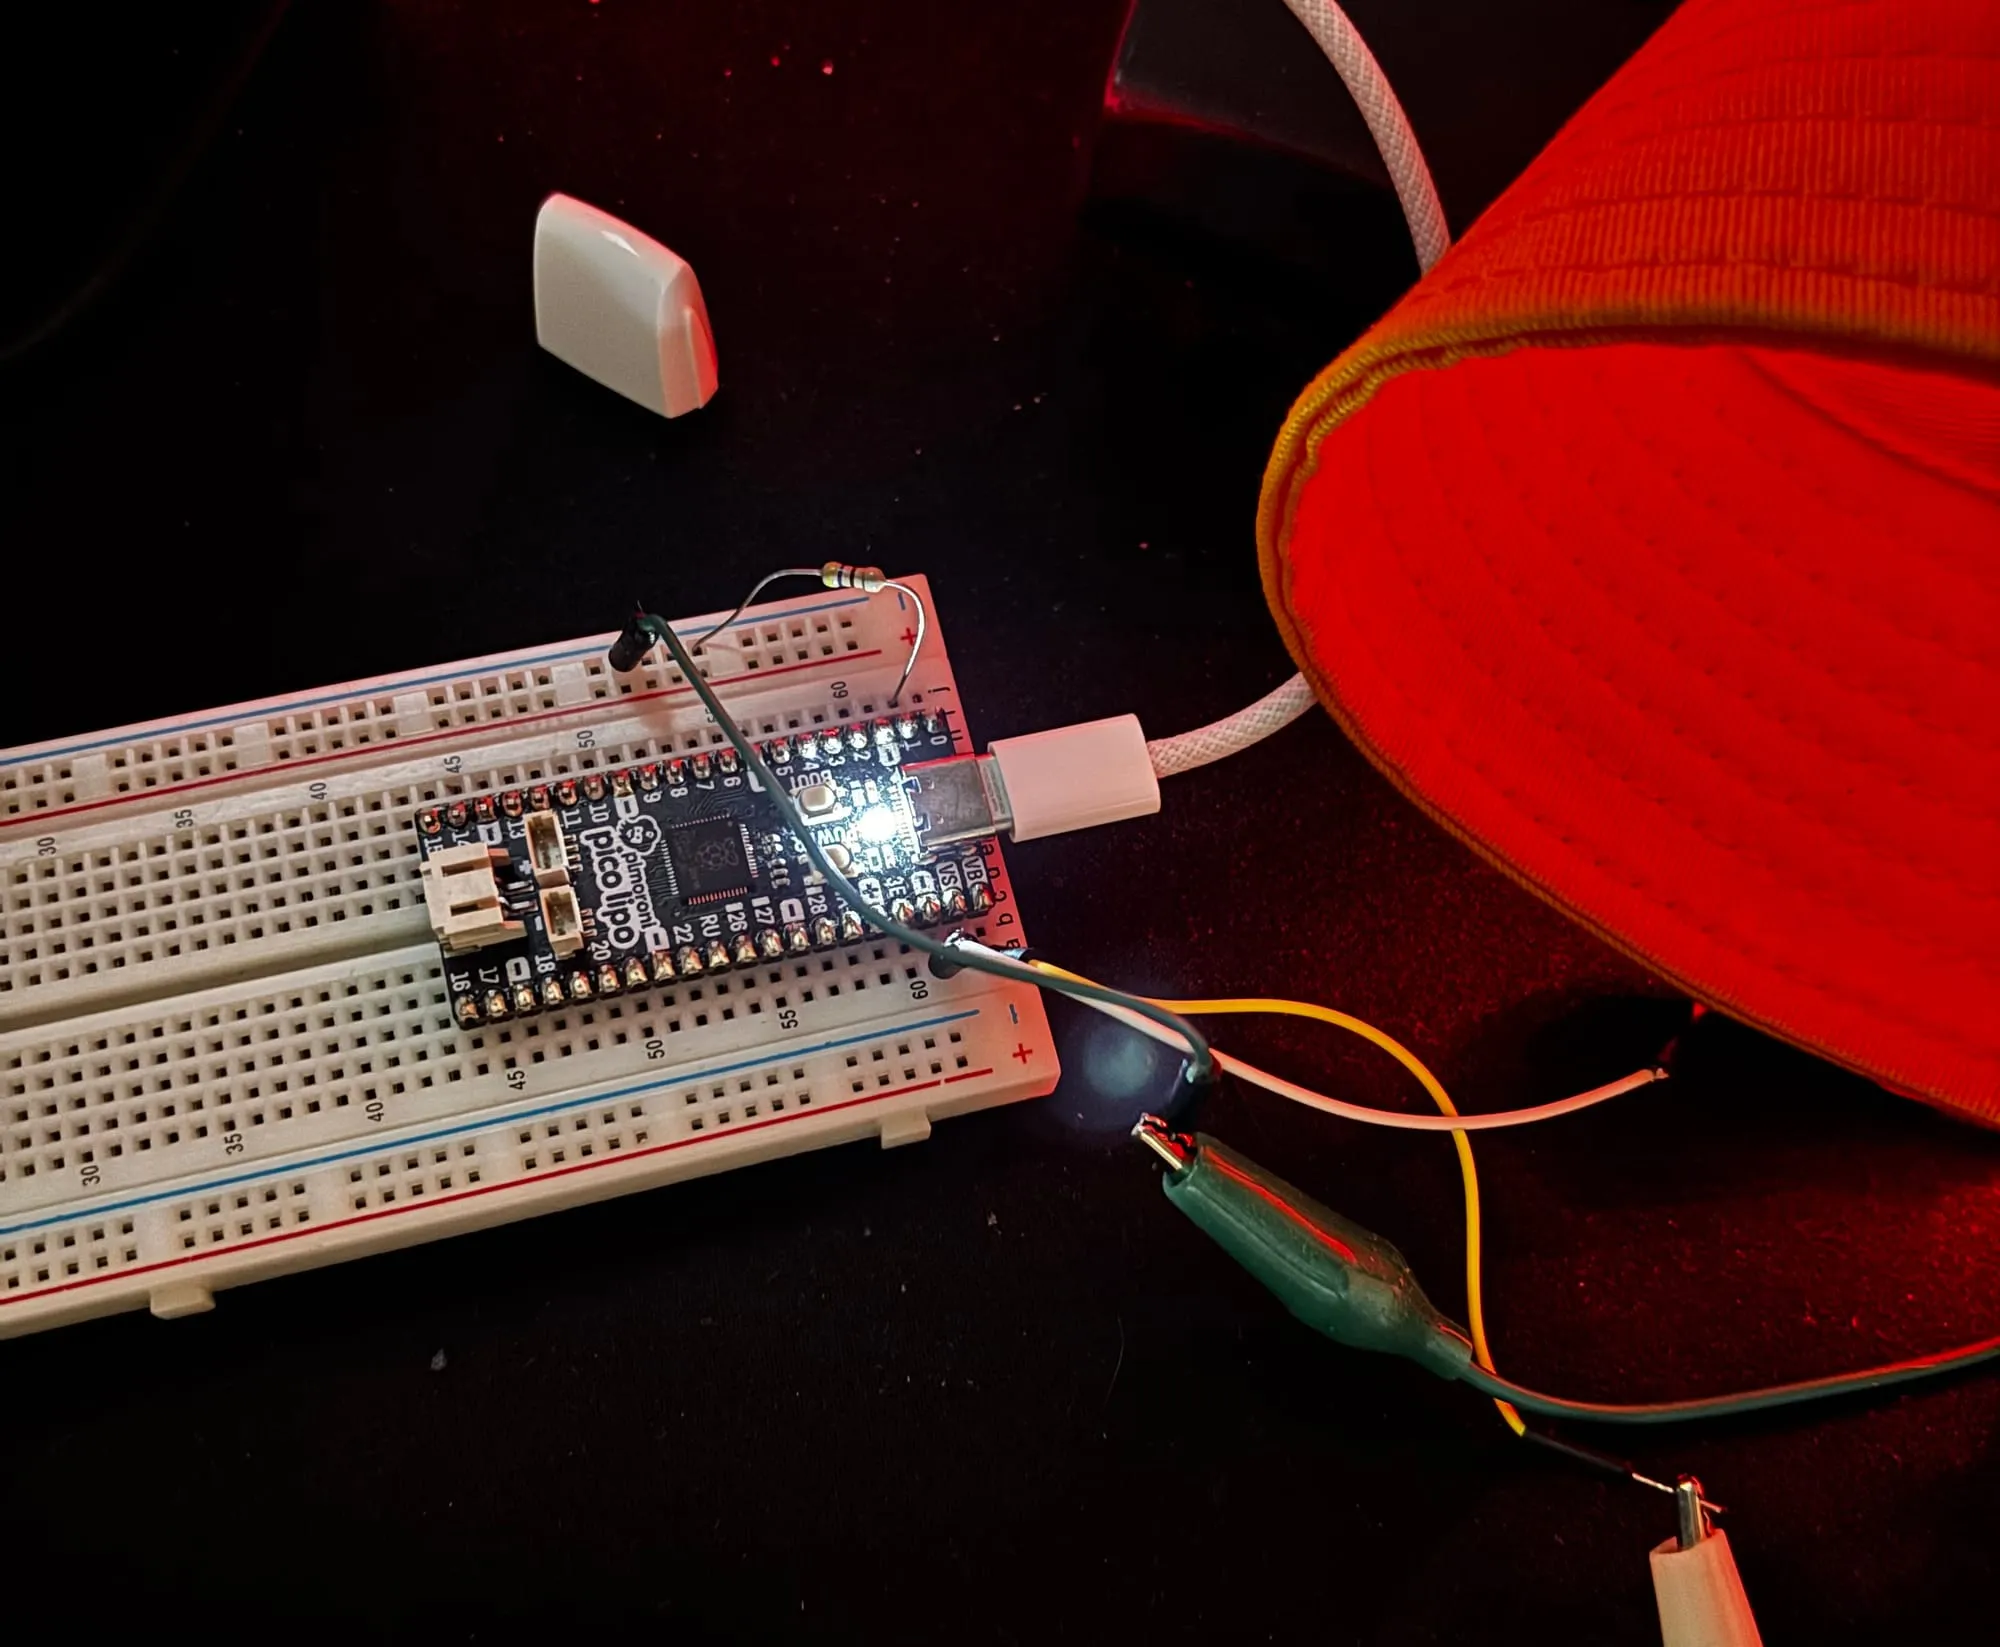
I got a basic Arduino project setup in Visual Studio Code with PlatformIO - I prefer it so much over using the Arduino IDE these days! I put together a simple program with the FastLED library.
With this project running of battery power - hopefully for as long as possible - I was trying to put a bit of thought into my code power-efficient. There are simpler (and more power-efficient) ways of driving the LEDs, but FastLED does a lot of heavy lifting when it comes to making good looking lighting effects.
I started off with FastLEDs simple blink sketch, then edited it slightly to use all the LEDs available on my strip.
FastLED also have a bunch of other great sketches which have examples of lighting effects, and I also found this great blog post with a bunch of effects too which I used for inspiration:
I also did a little bit of vibe coding to get a bunch more effects built in too.
Here's the final code I had with 8 different lighting effects, plus an "auto-cycle" mode which loops through all the effects. With just a single button, I had some code which detected long vs. short presses of the button. For certain effects, like the solid colour, it would change the colour when long pressed, and for other effects it would adjust the brightness. Short pressing the button would cycle to the next effect.
Assembling
Once I was happy with the code, I put the hat together.
I wanted to buy a cheap hat which was either black or white, but I wasn't able to find one locally which I was quite surprised at! My backup plan was a free branded bucket hat which I don't wear very often.
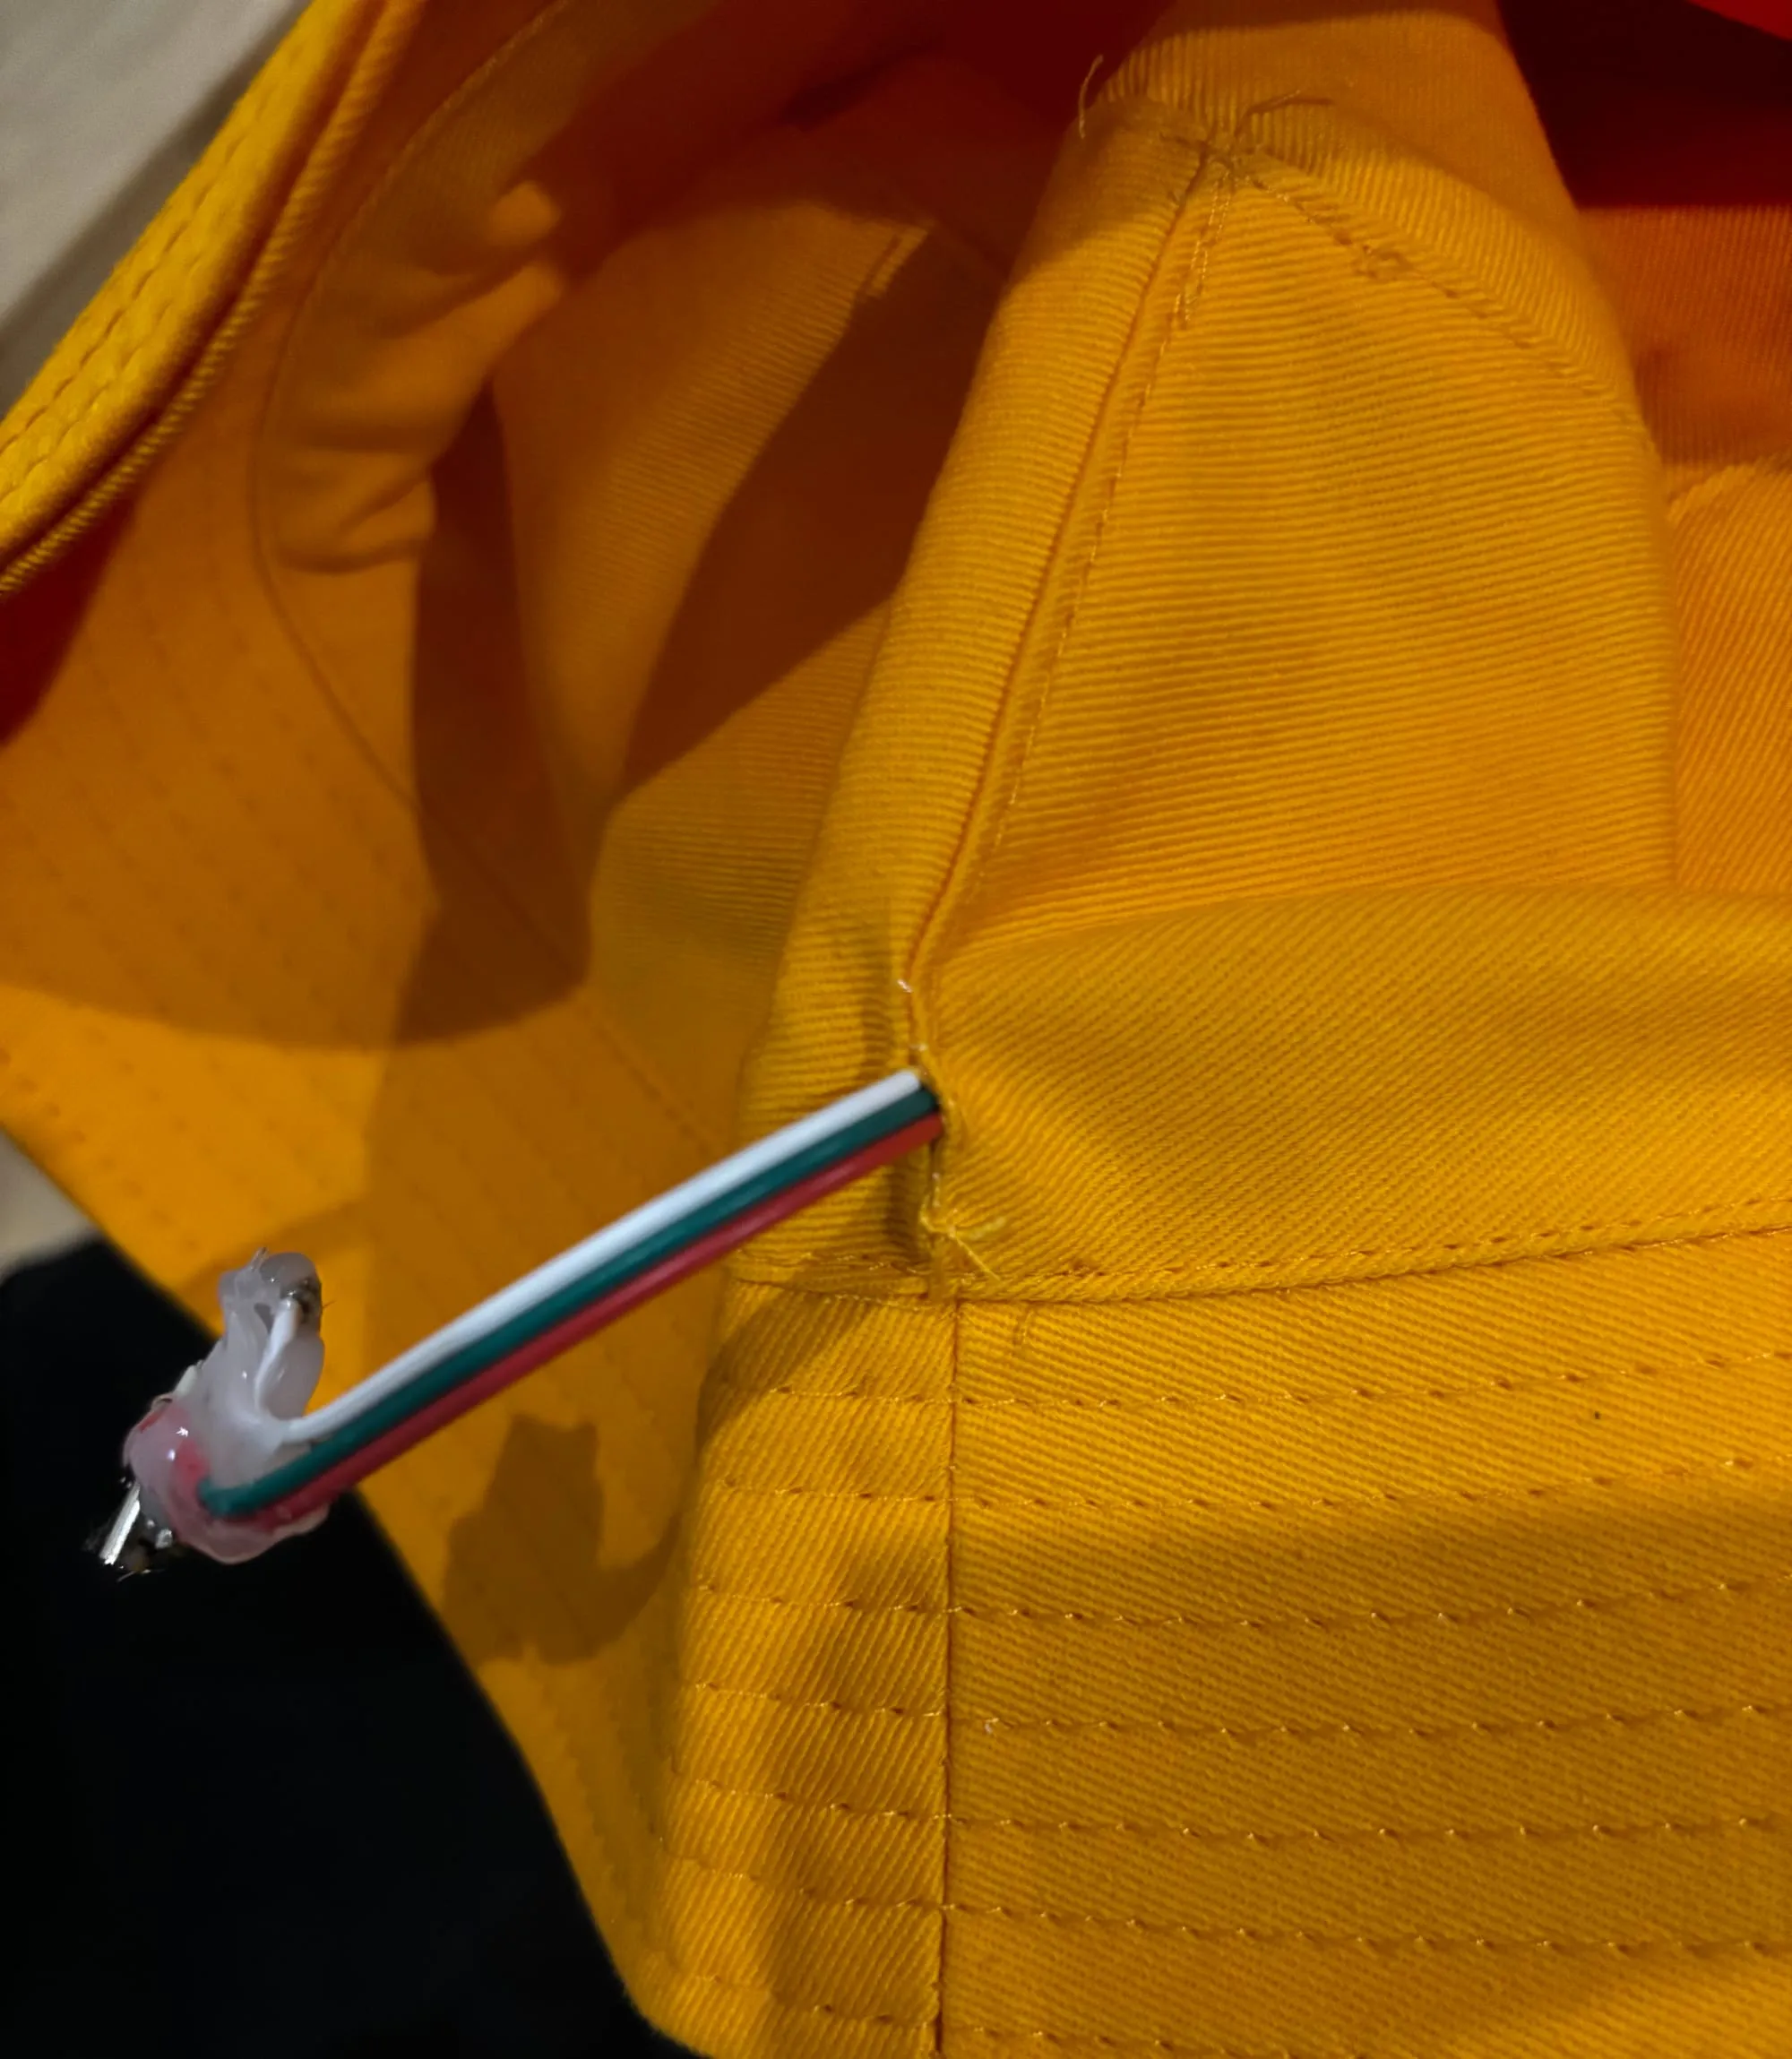
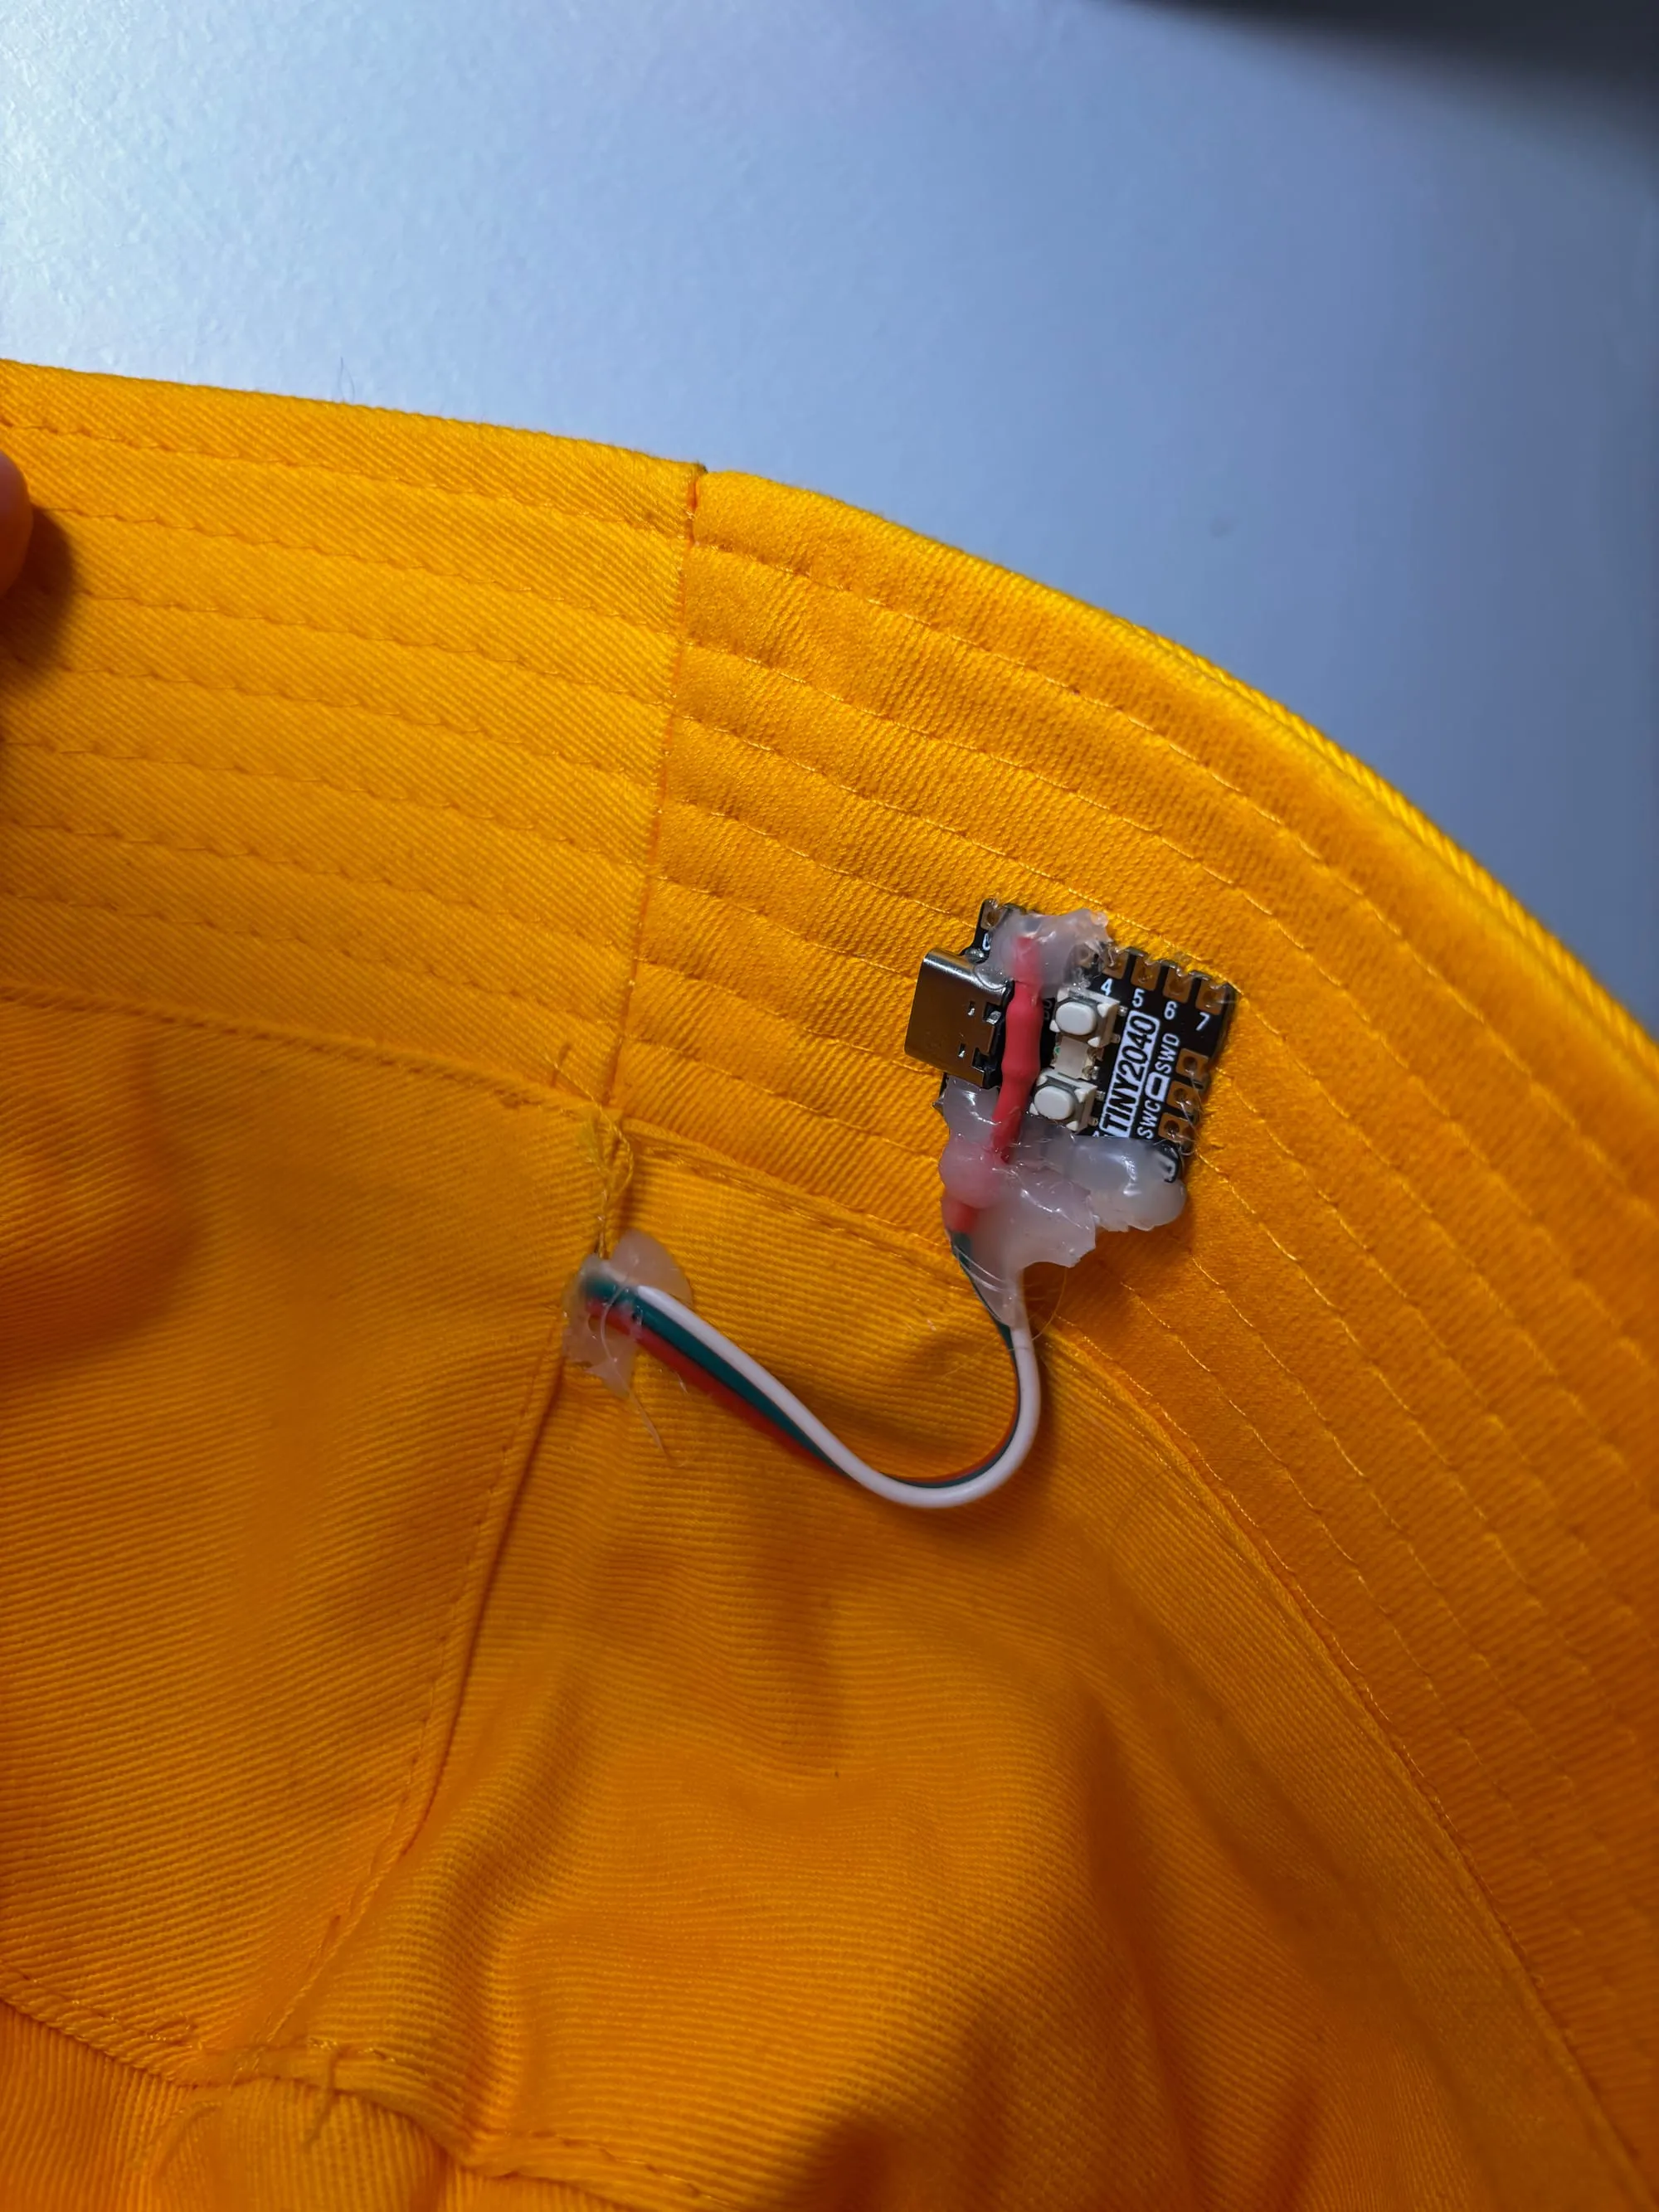
I started off by unpicking some of the stitches on one of the seams so I could poke the LED strip wires through to the inside.
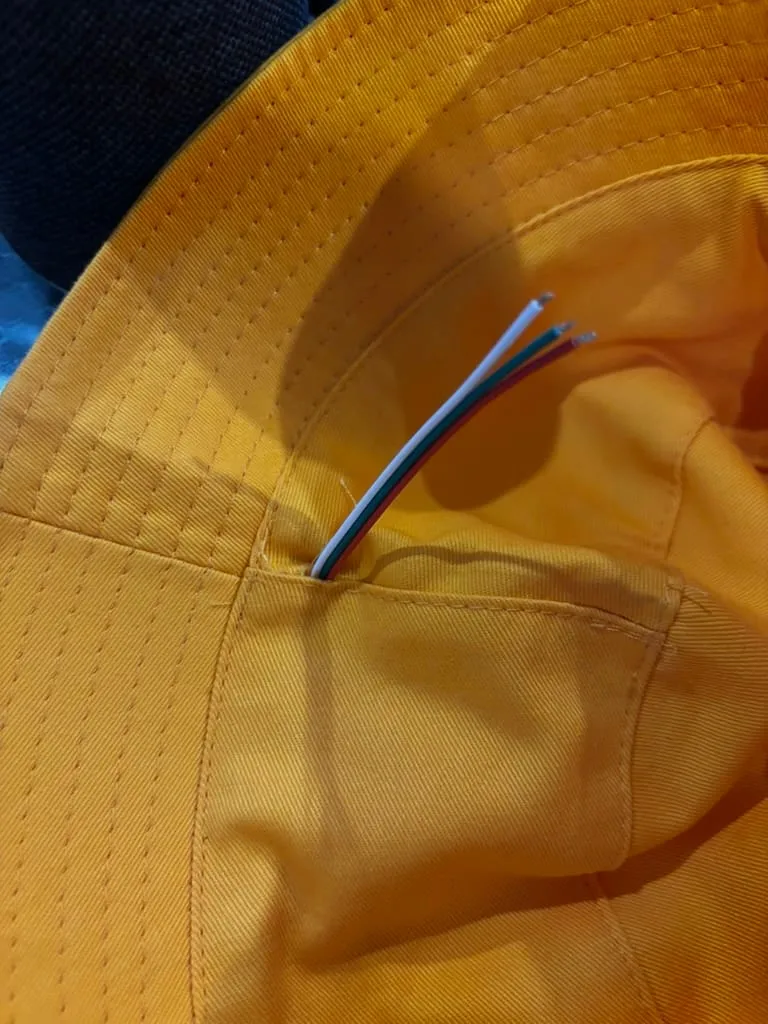
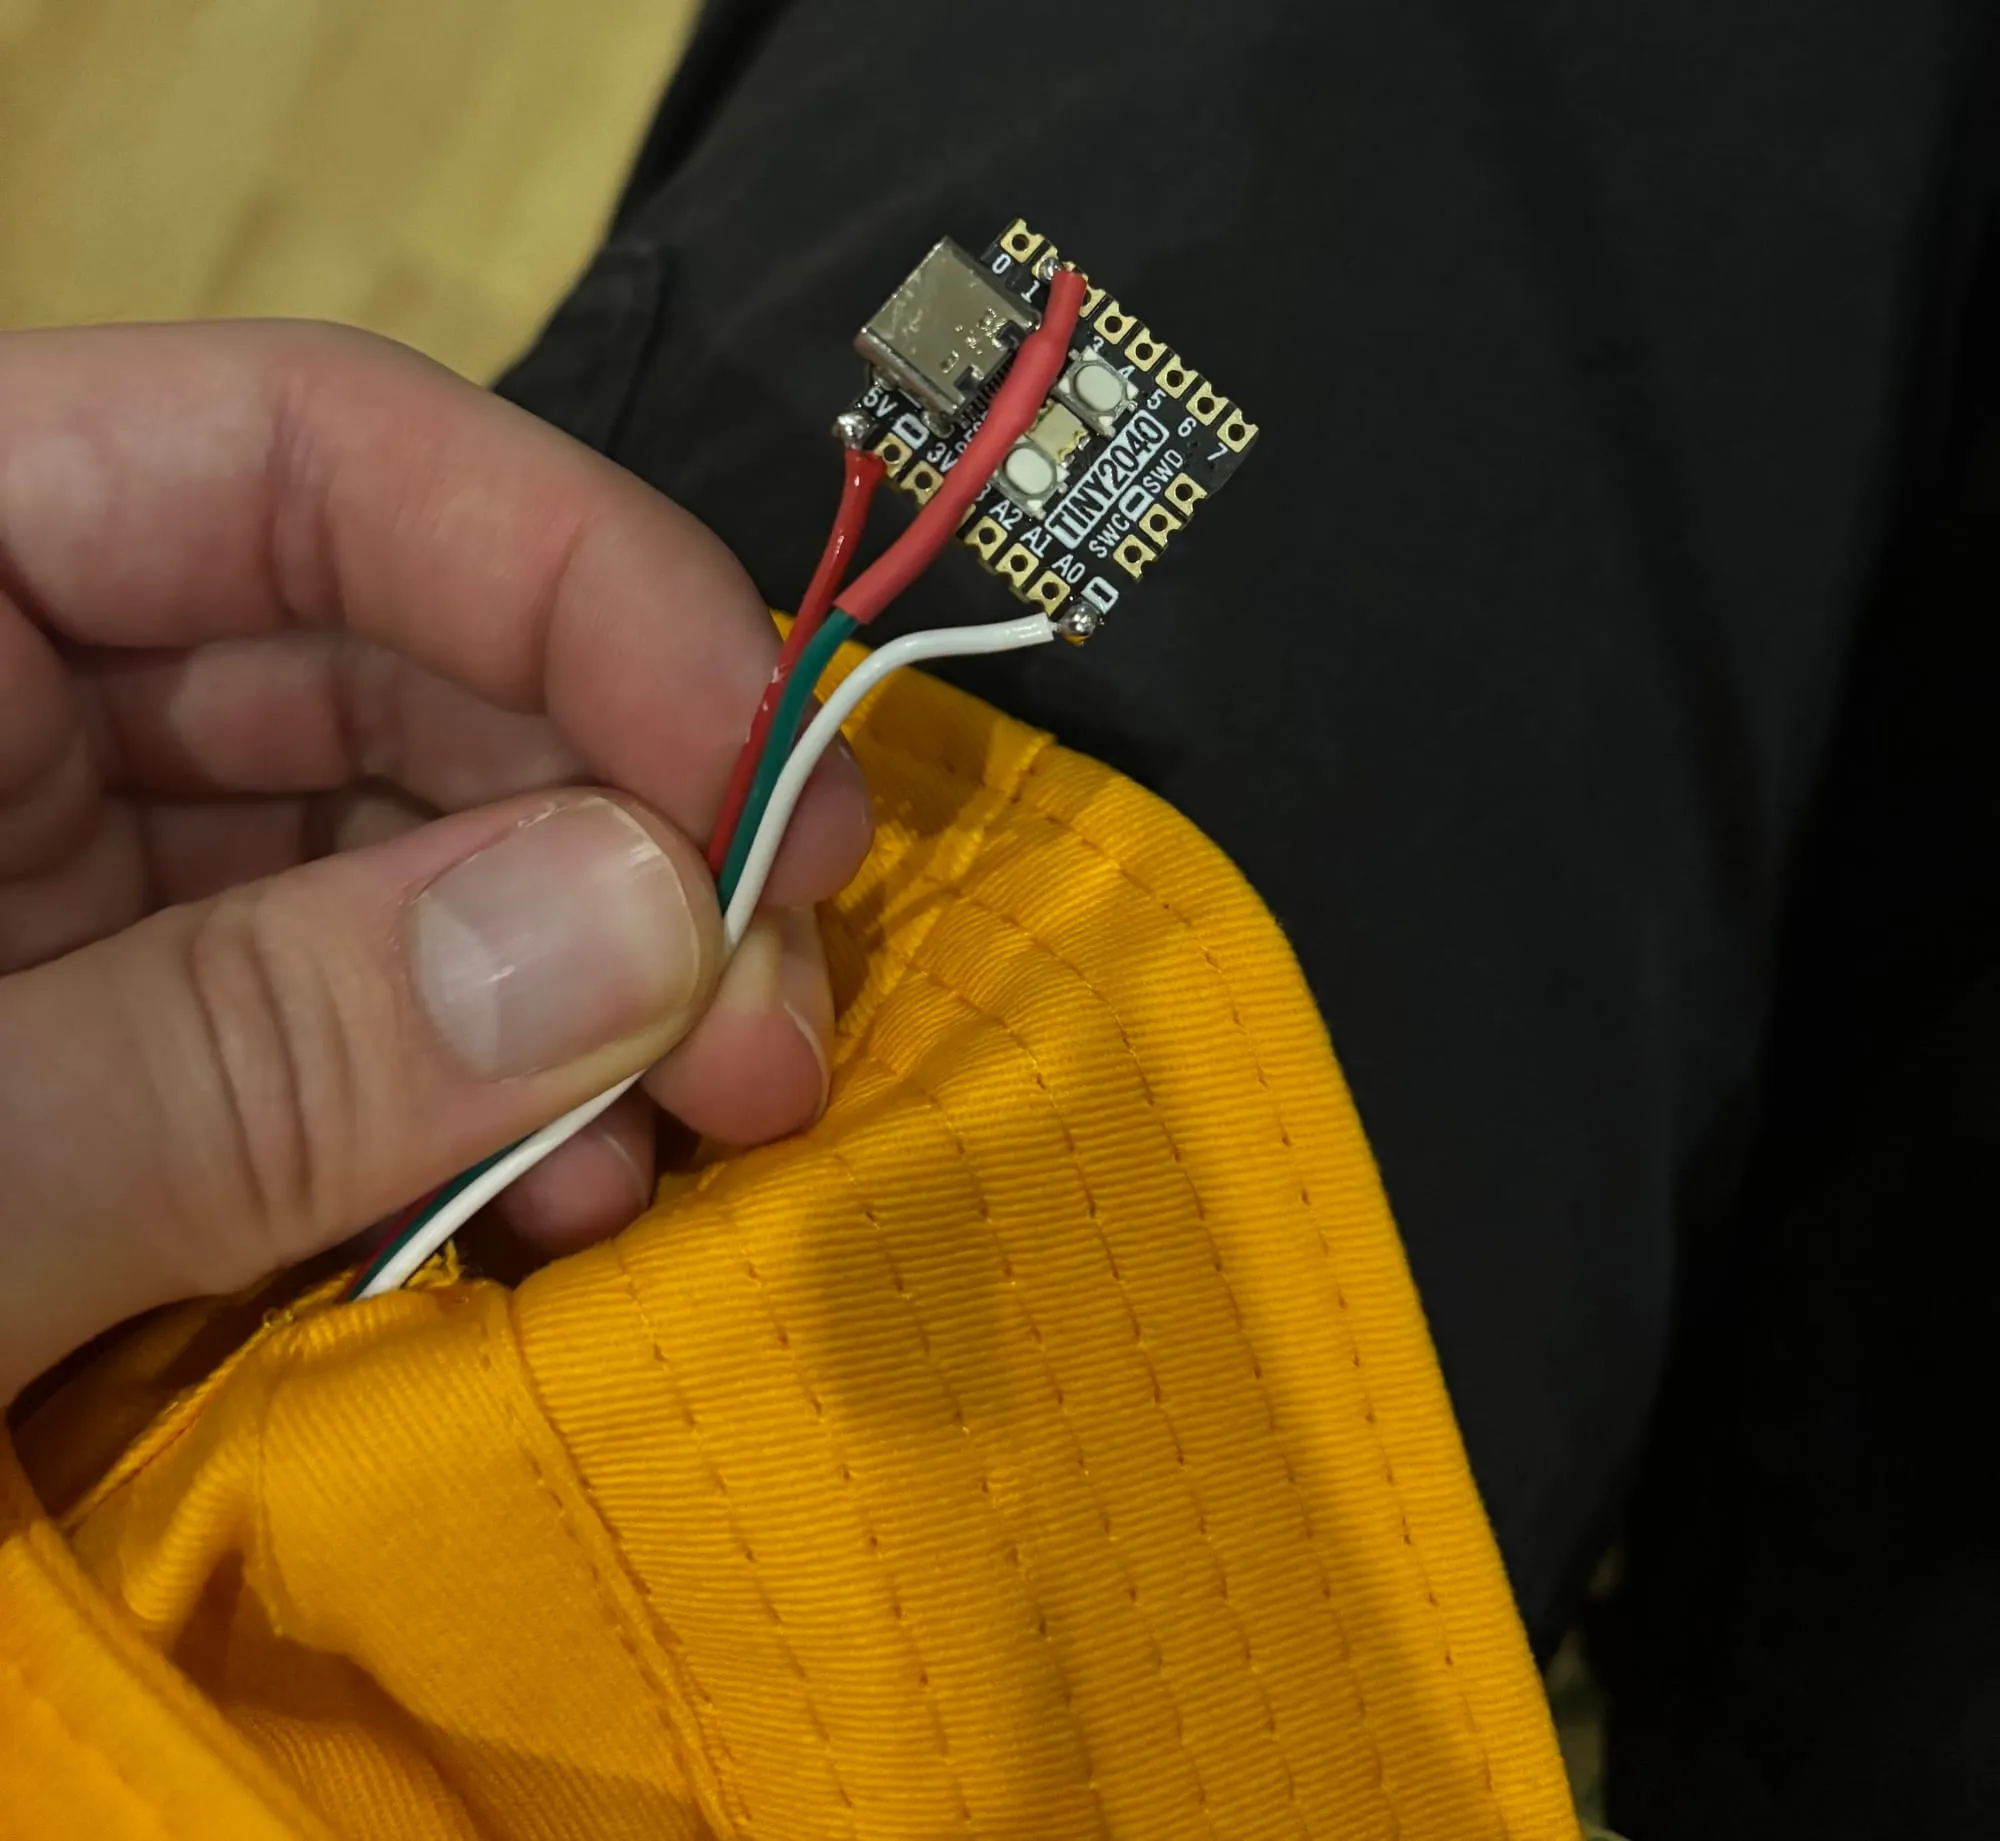
With the wires poked through the hat, I soldered on my protective resistor to the green data line, then put some heat shrink tubing around it to stop it from shorting against the microcontroller. The power line is soldered to the 5v pad and ground to ground. The other end of the resistor can go to any pin.
Side note - this microcontroller - the Tiny 2040 is in fact very small, only about the size of a 50p coin or less! And has also has built-in Neopixel too
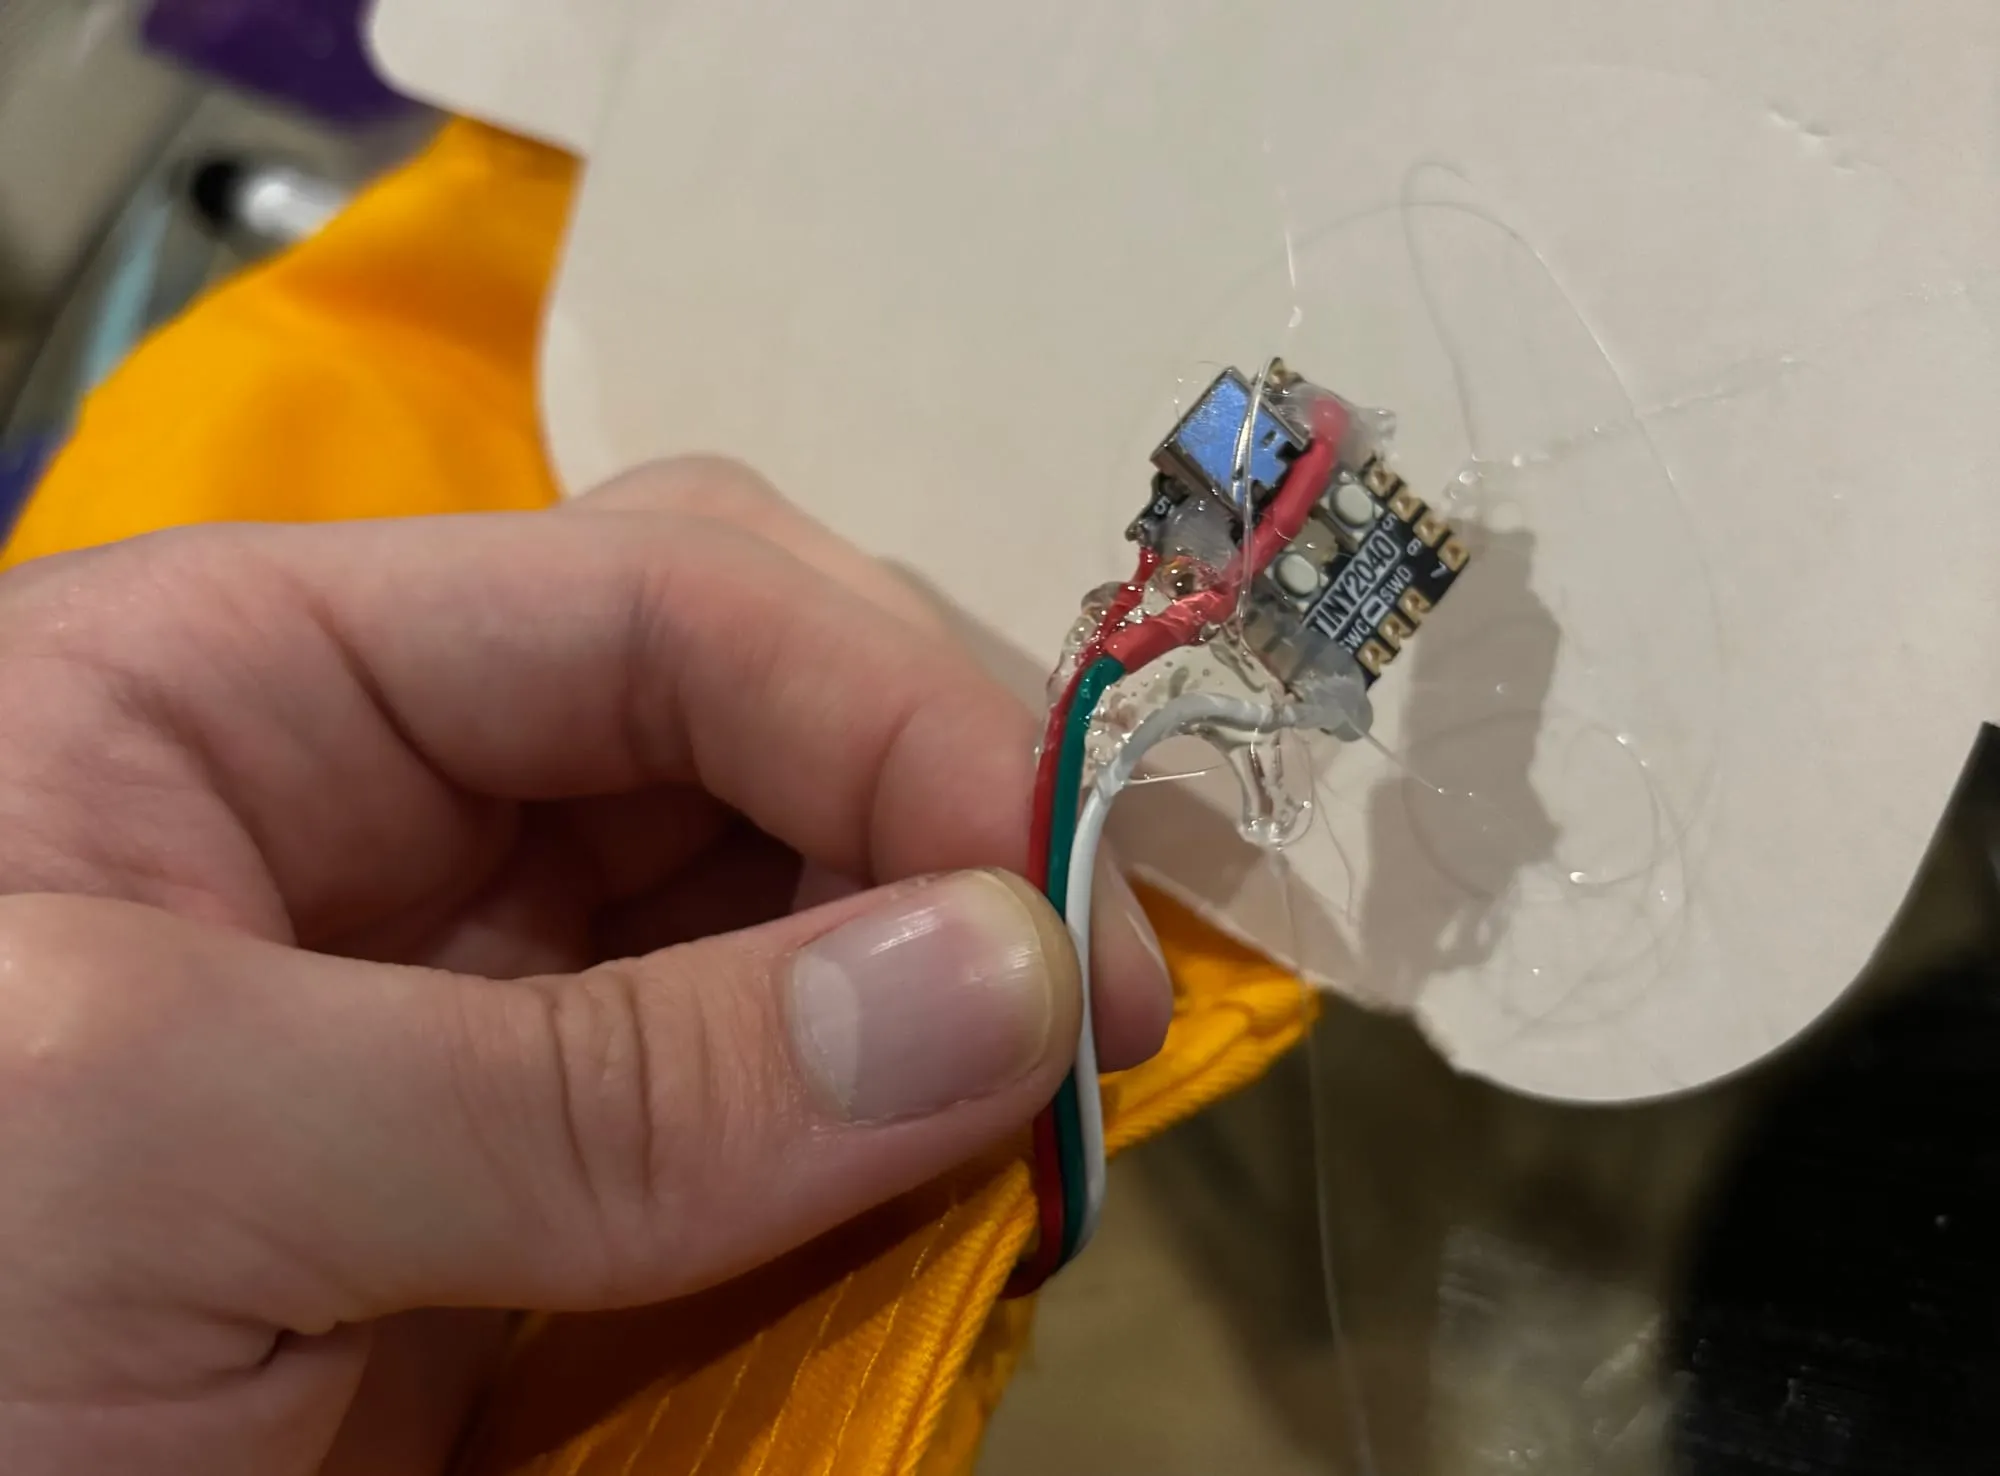
Finally I coated the microcontroller and it's wires in a healthy amount of hot glue to keep everything in place and protect against tugs on the wires.
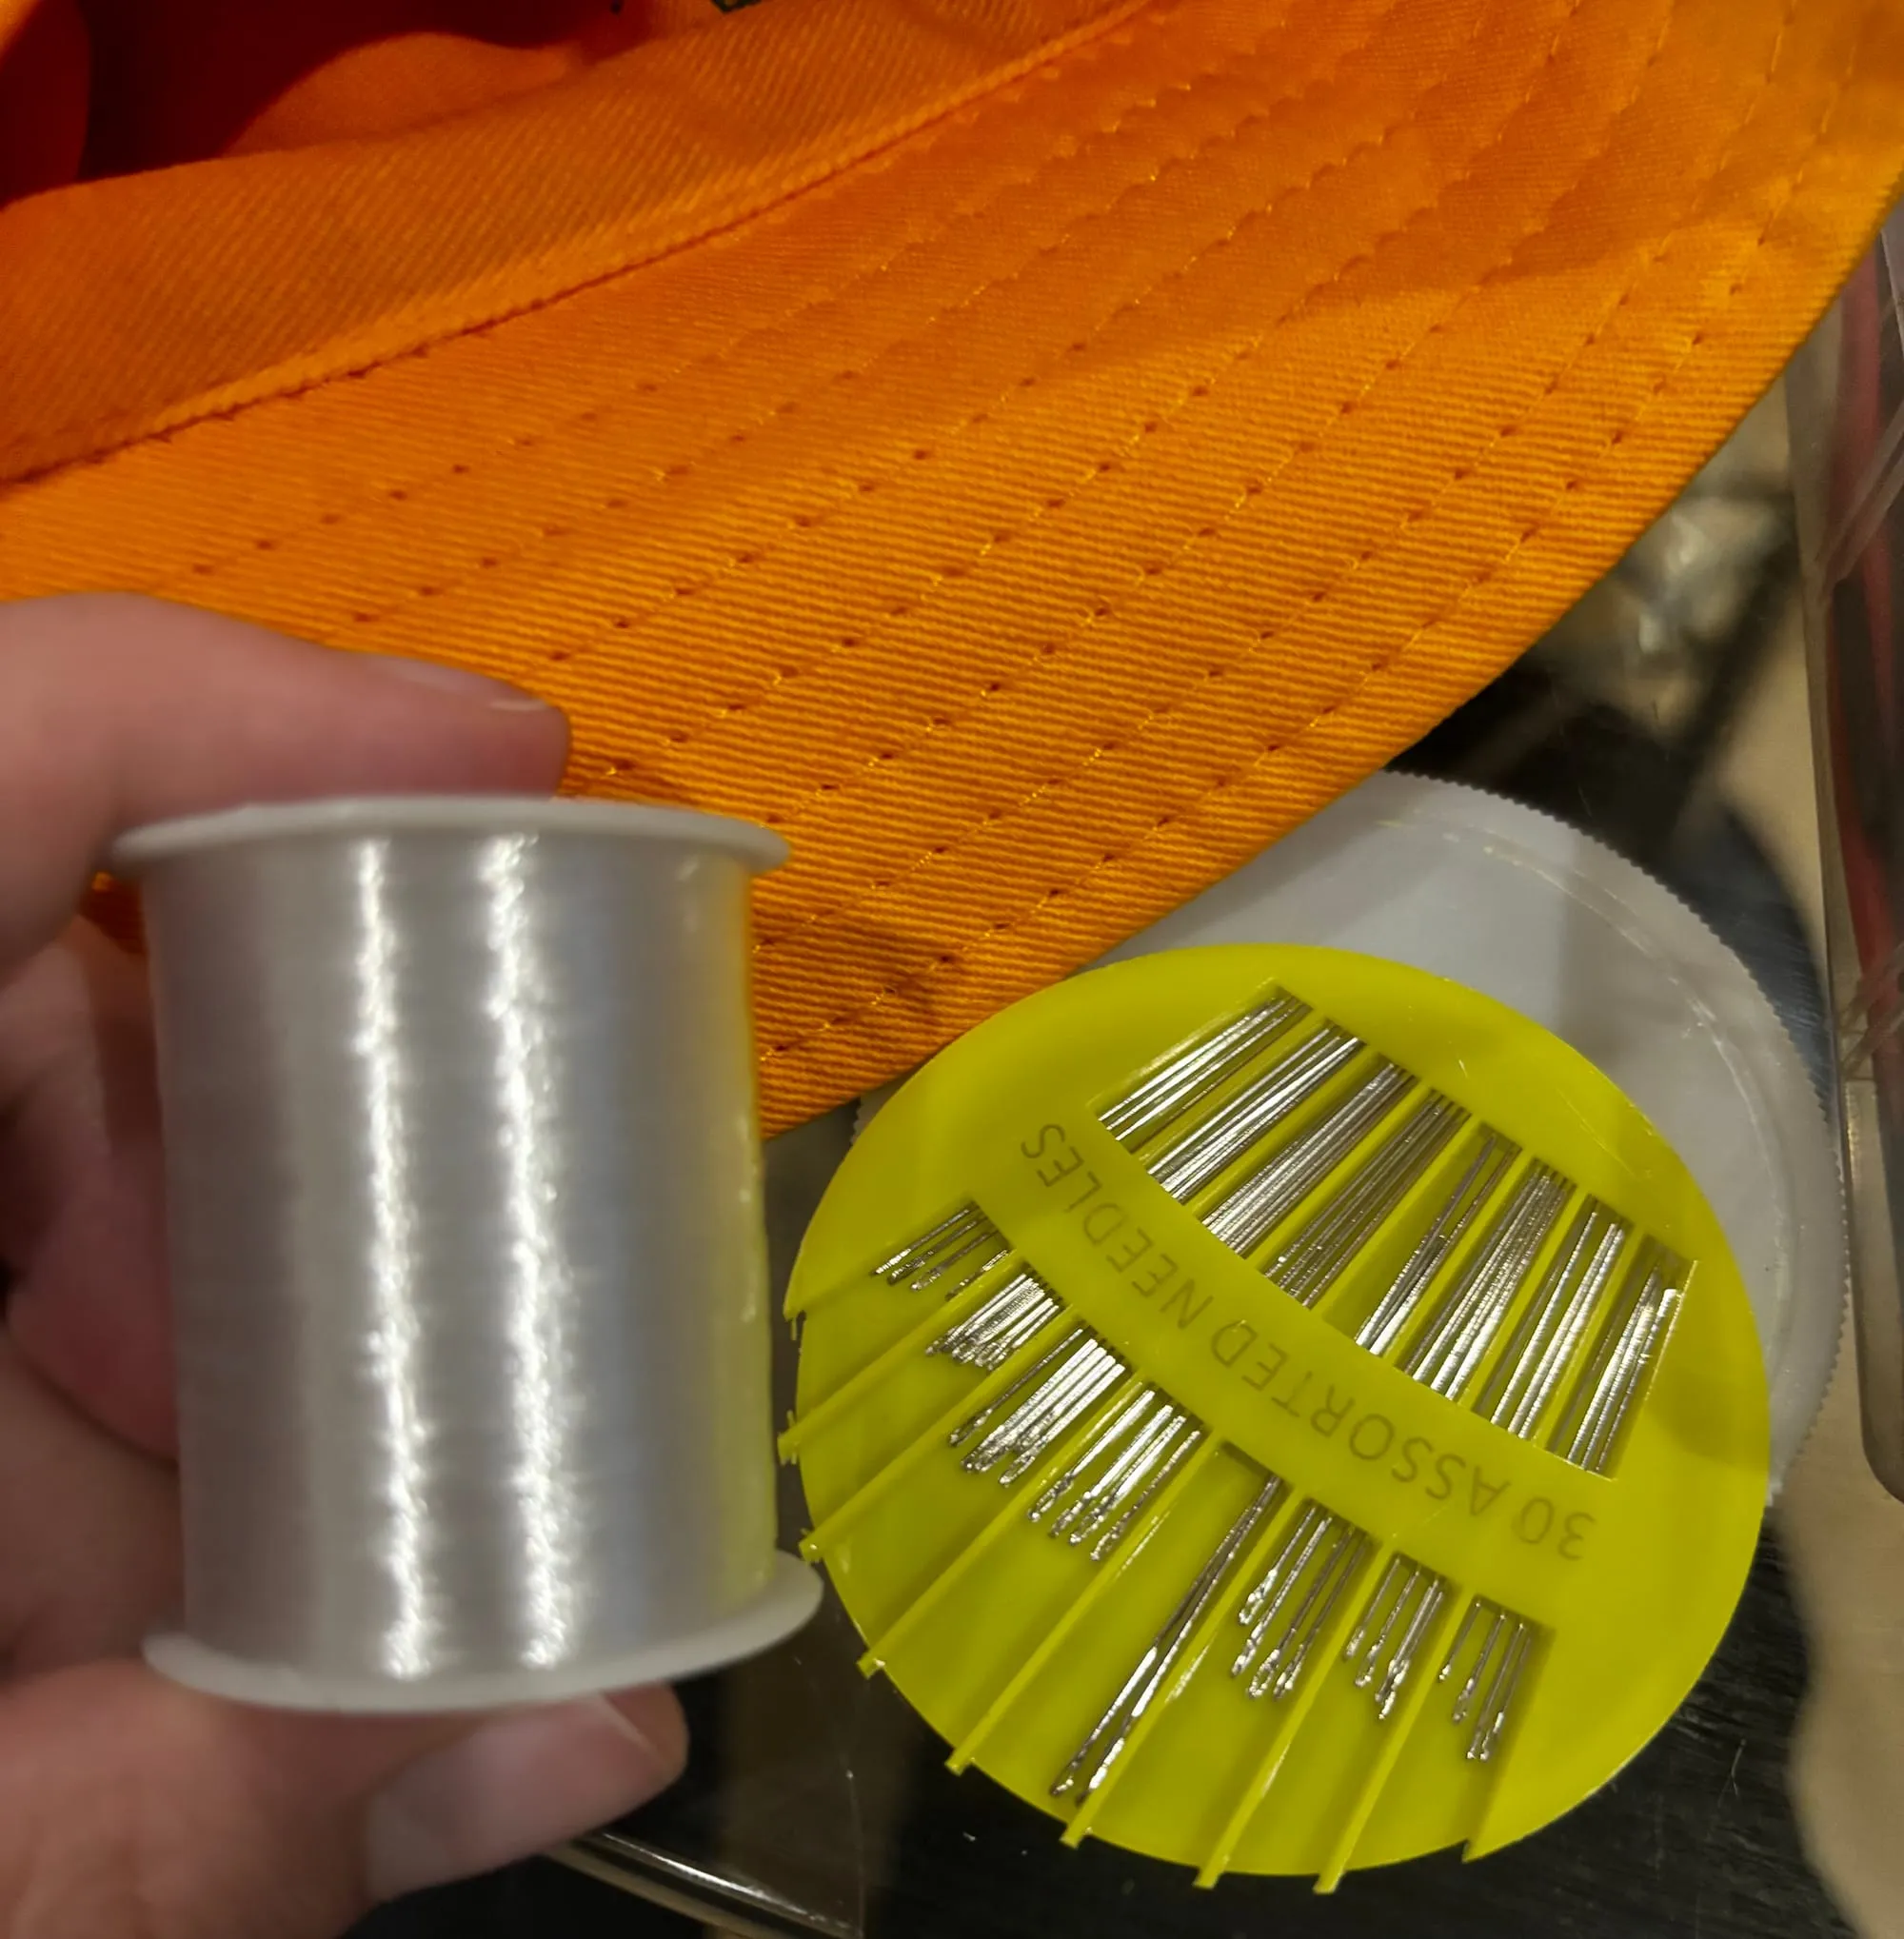
Next up was sewing the hat. Luckily my mum (hi mum!) taught me to sew when I was younger, but it's been a couple of years since I have done so. I found some very cheap needles and transparent thread locally. The first parts weren't very neat, but I got into the swing of it pretty quickly.
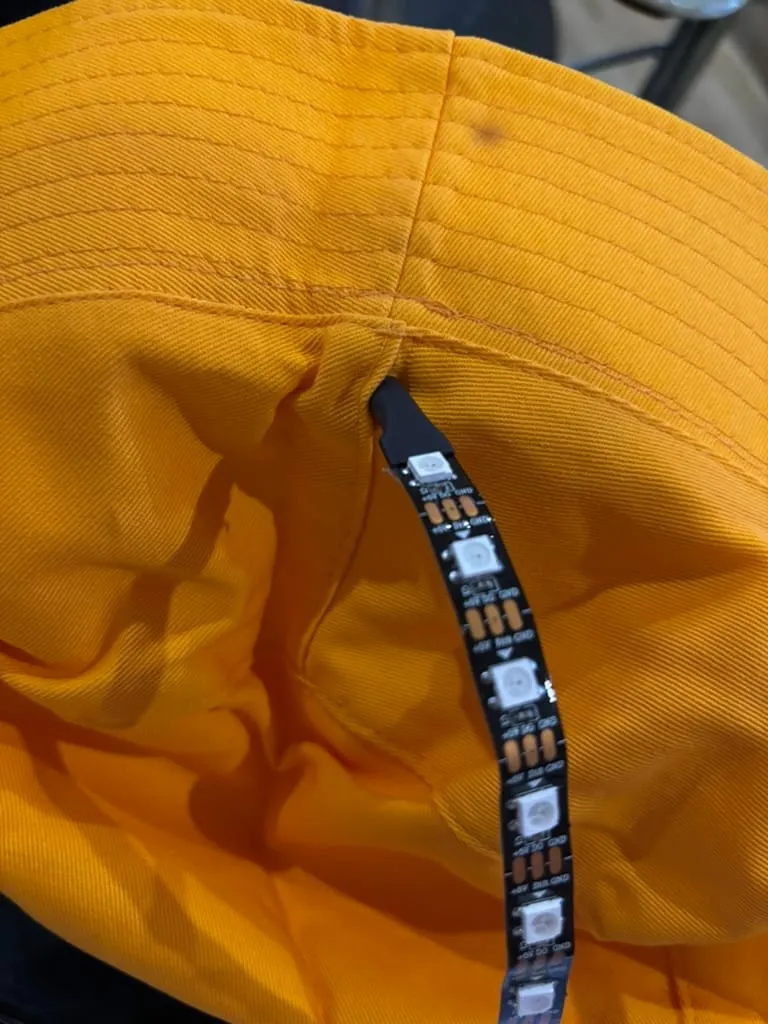
First, I reinforced the hole I had made earlier to stop it from getting any bigger, then sewed the LED strip around the outside of the hat.
I should have probably chosen better needles, as I broke 3 of them just sewing this hat, but luckily there were plenty more. The transparent thread made it super difficult to see what I was doing, and I even considered swapping to black or white, but I powered through in the end.
For the finishing touches, I hot glued the cable very lightly at the hole to keep it in place, and sewed the microcontroller to the underside of the rim using the unused pads.
I wanted to do this project in such a way where I could reuse the parts for other projects in the future, and ideally get the hat back to normal too - so I tried to be neat and non-destructive with everything. Time will tell, but I think it should be easy enough to unpick the thread keeping the LED strip and microcontroller in place, and pick off the hot glue used everywhere.
Fin
Here's the finished product! The LEDs get very bright, so I did have to turn down the brightness when I was using it. I got a little bit of use from it, but I think it'll fit right into EMF Camp when I hopefully go next year.